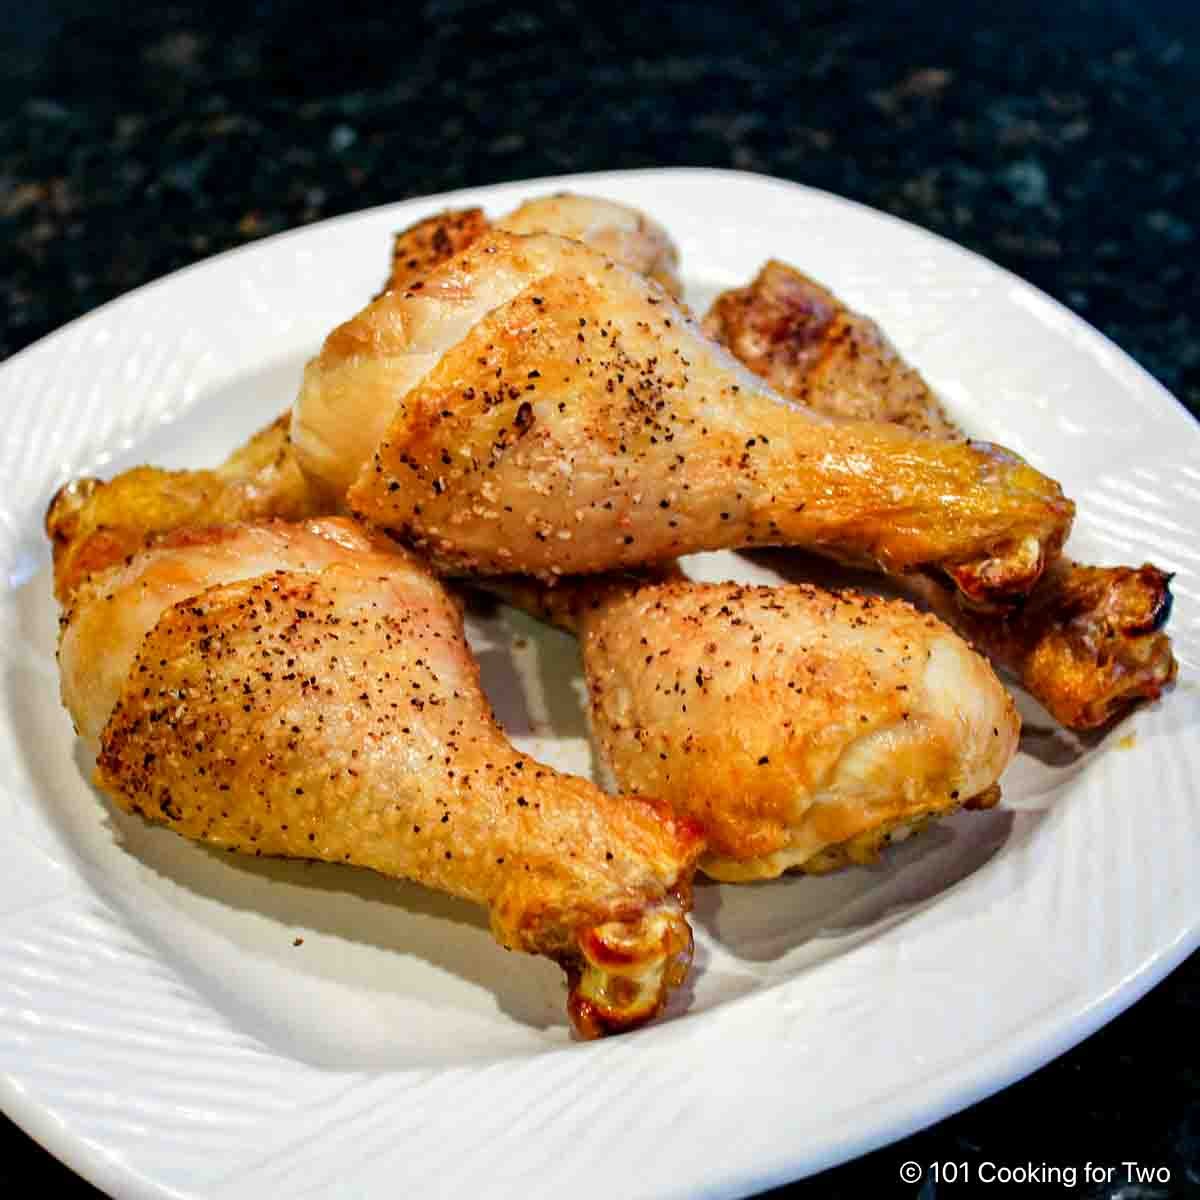
Crispy baked chicken legs (drumsticks) are fast and easy, with about 5 minutes of prep time. Use a simple seasoning and then bake for about 35 minutes with convection—perfectly crispy, moist, and tender every time.
🐓Ingredients
Chicken Legs (drumsticks)
Seasoning—salt, black pepper, and garlic powder mixture (All-Purpose Seasoning) OR
Optional seasoning of your choice
Jump To (scroll for more)

Featured Comment from Gillian:
"I'm so happy I found your recipe! I've never found a simple chicken recipe I liked very much, but this looks like The One!"
Everybody needs great chicken recipes, and this healthy baked chicken legs recipe is one of the easiest and best for the home cook. Even the pickiest kids love baked chicken drumsticks.
It's easy and quick to prep in only 5 minutes with simple seasoning. Then, cook at a high oven temperature for crispy skin without frying for about 35 minutes. Perfect for a healthy low-fat or low-carb diet.
👨🍳How to Bake Chicken Legs—Step-by-Step
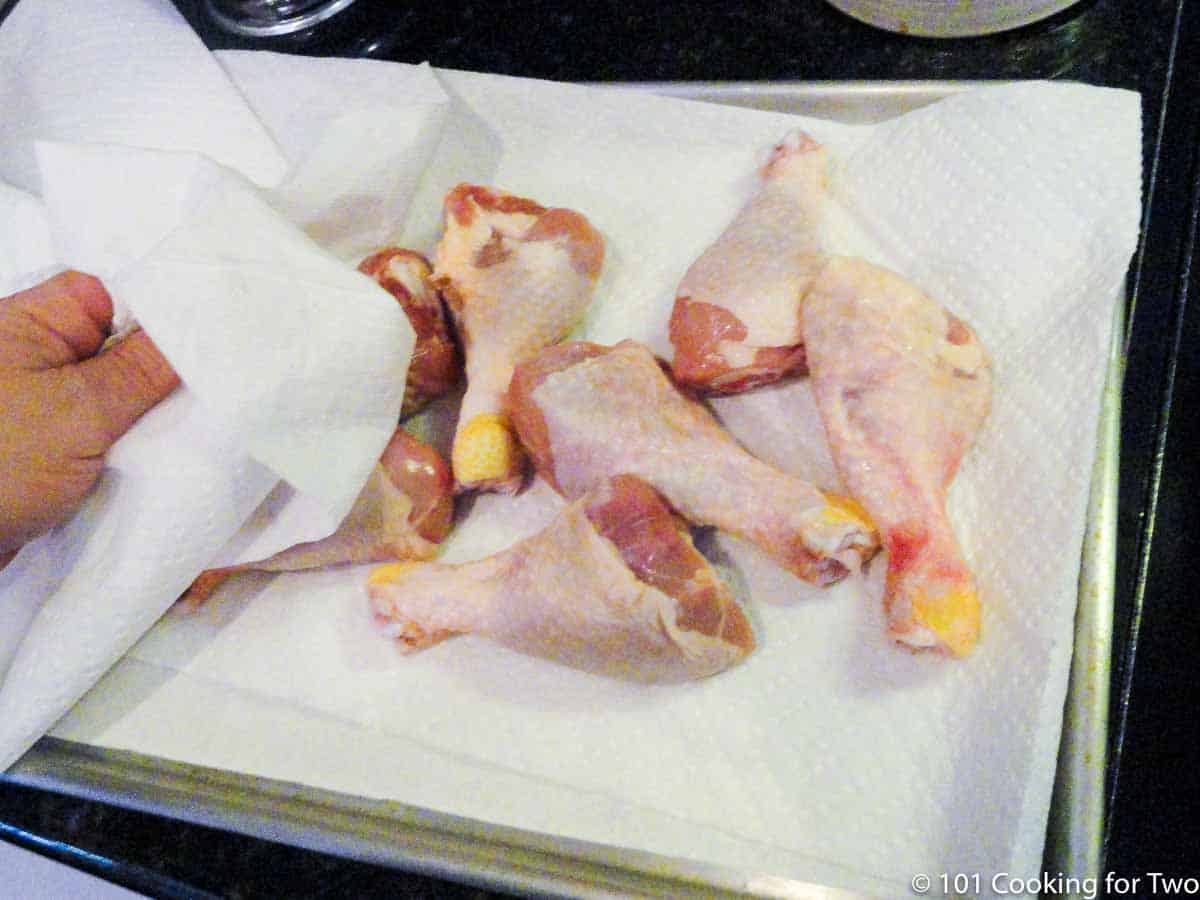
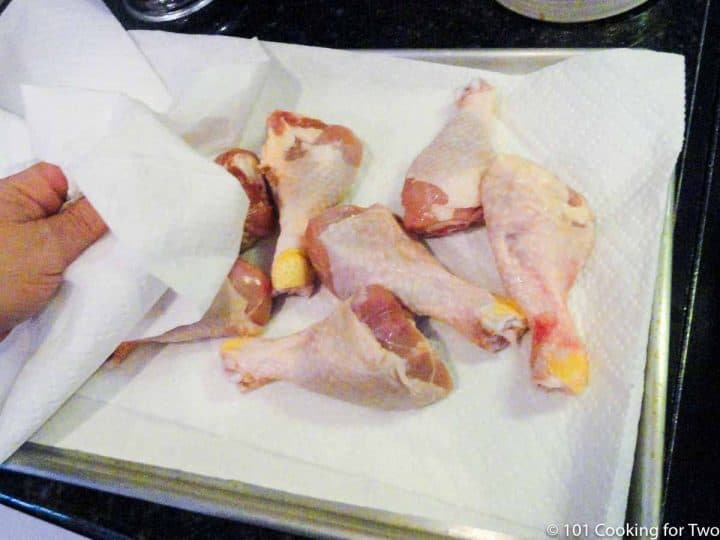
1. Preheat oven to 425° convection. Pat dry the chicken legs with paper towels.
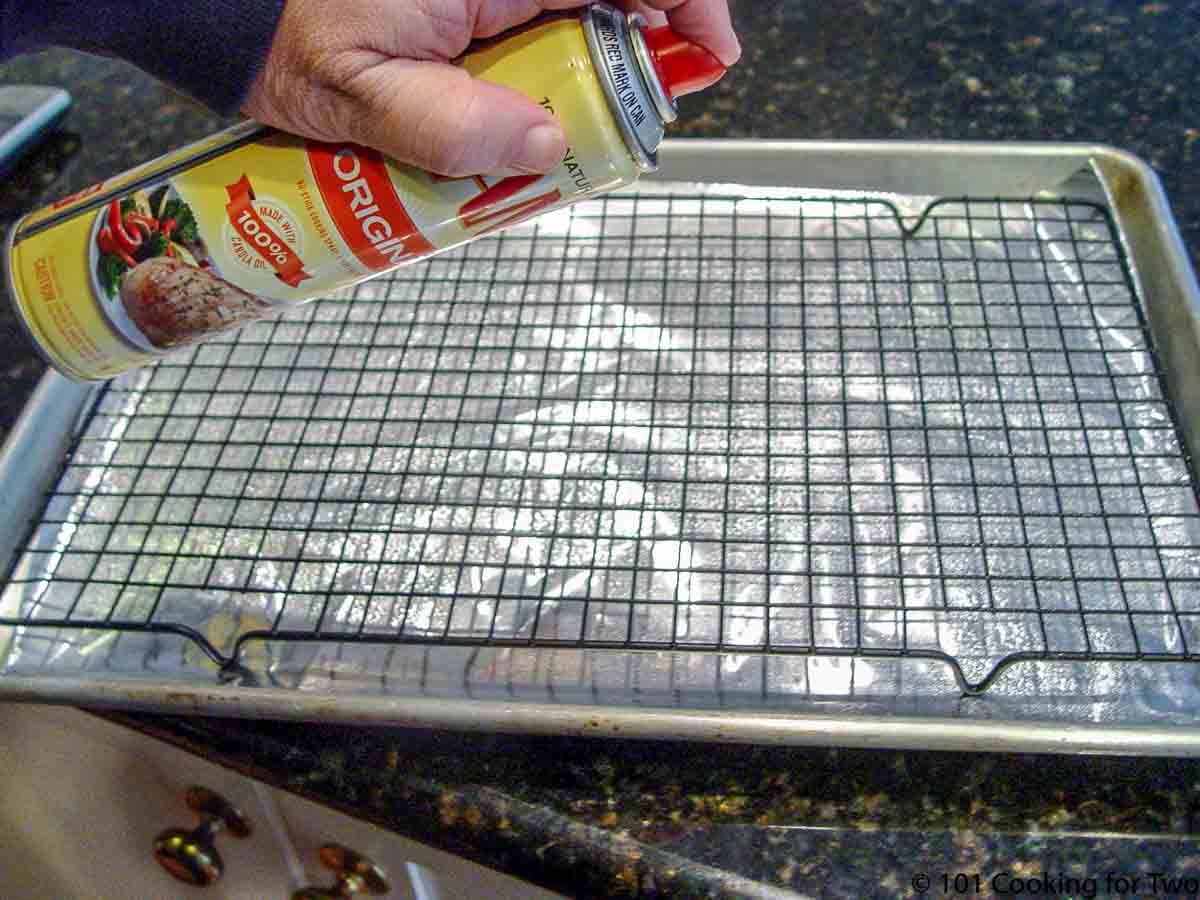
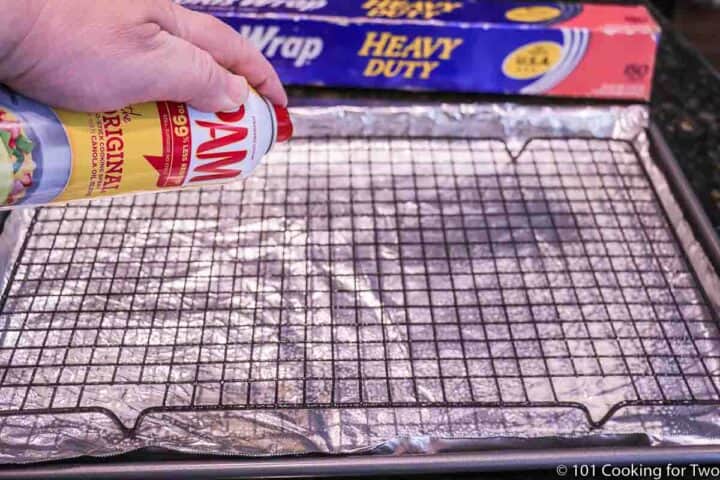
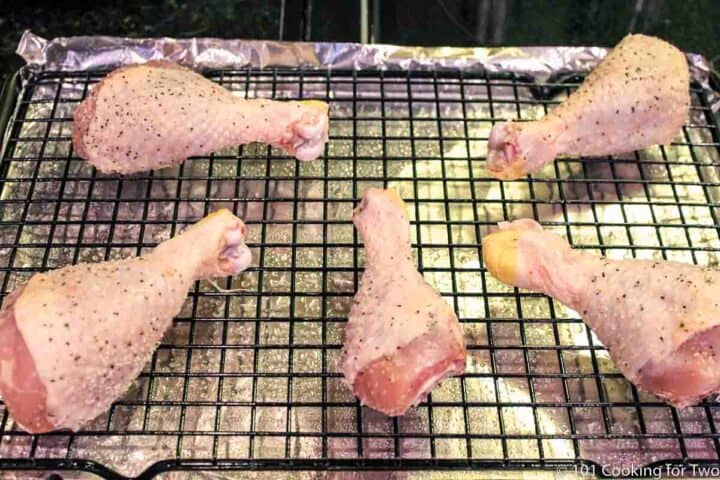
2. Line a sheet pan with aluminum foil and add a rack sprayed with PAM cooking spray. The rack allows all sides of the chicken to cook evenly out of drainage. You can cook without the rack but should flip halfway through cooking.
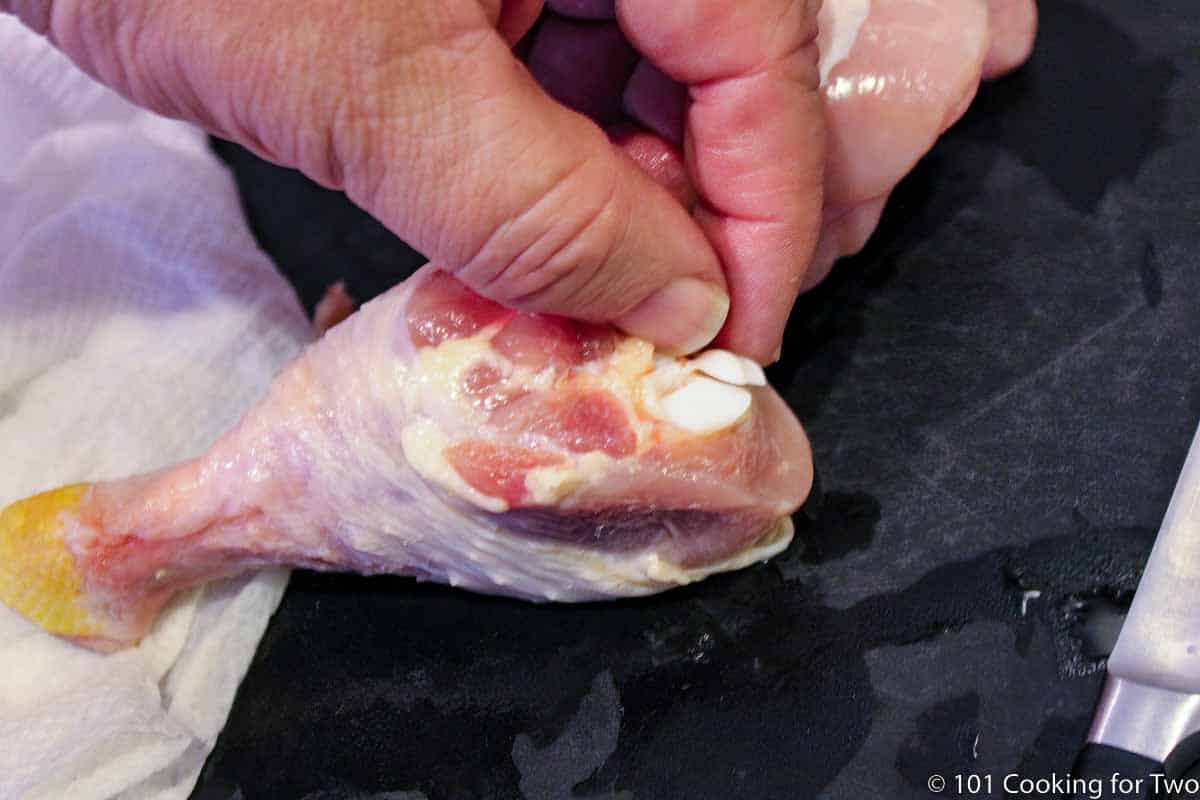
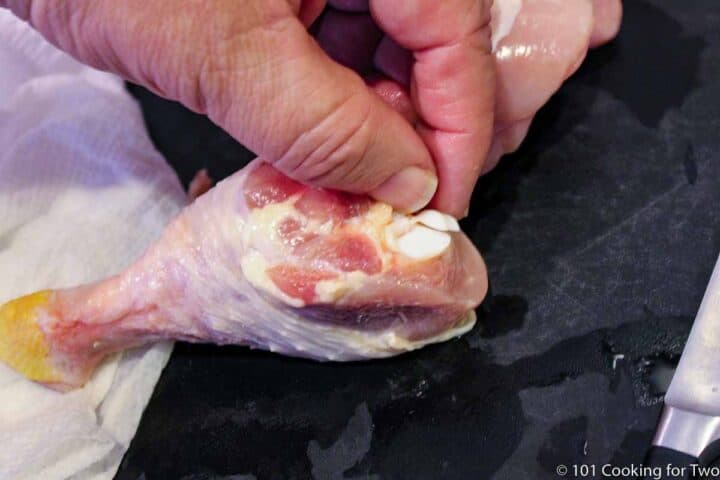
3. Trim off any extra skin and any loose joint pieces.
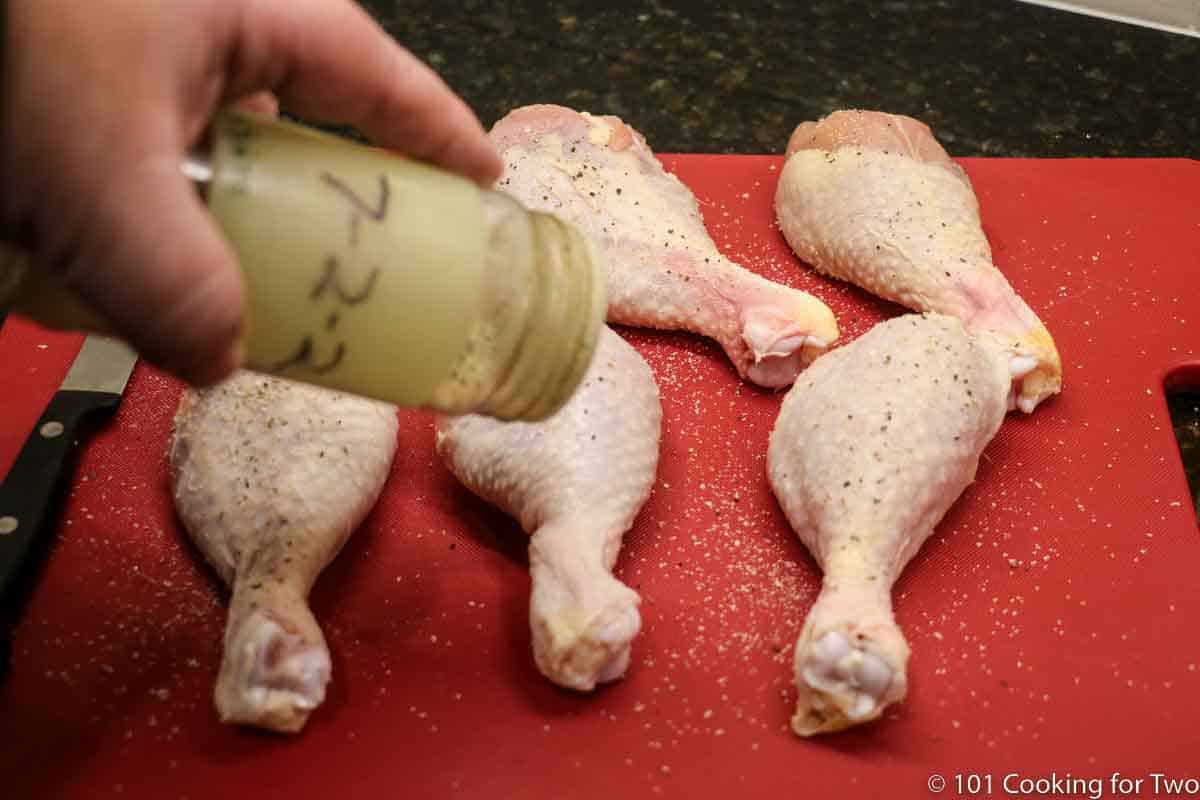
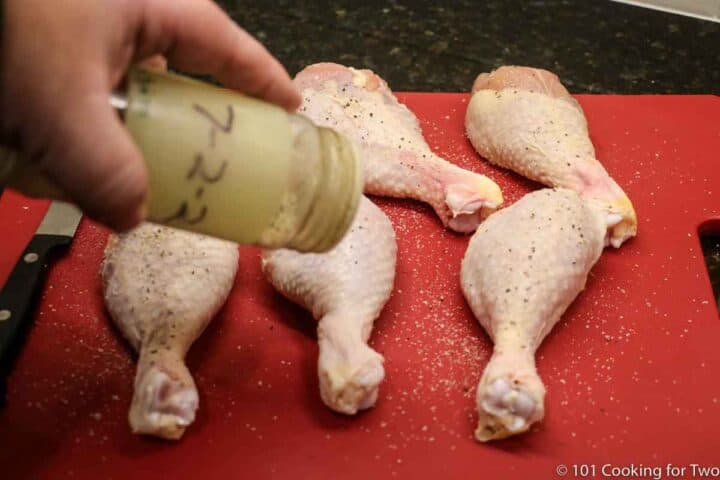
4. Season to taste with salt and pepper. You can use other seasonings if you wish. We use All Purpose Seasoning - 7:2:1 and 7:2:2, which includes garlic powder.
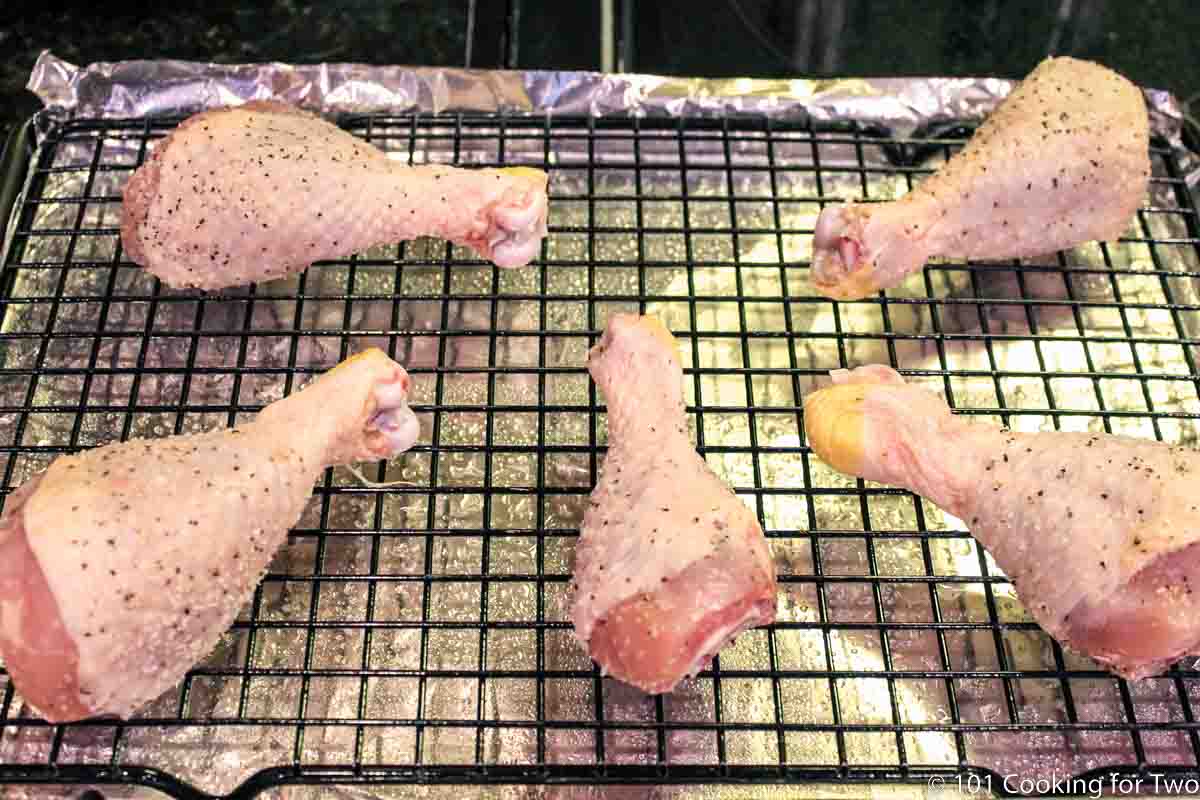
5. Place the legs on a prepared sheet pan with the thicker part of the chicken legs towards the outside of the tray.
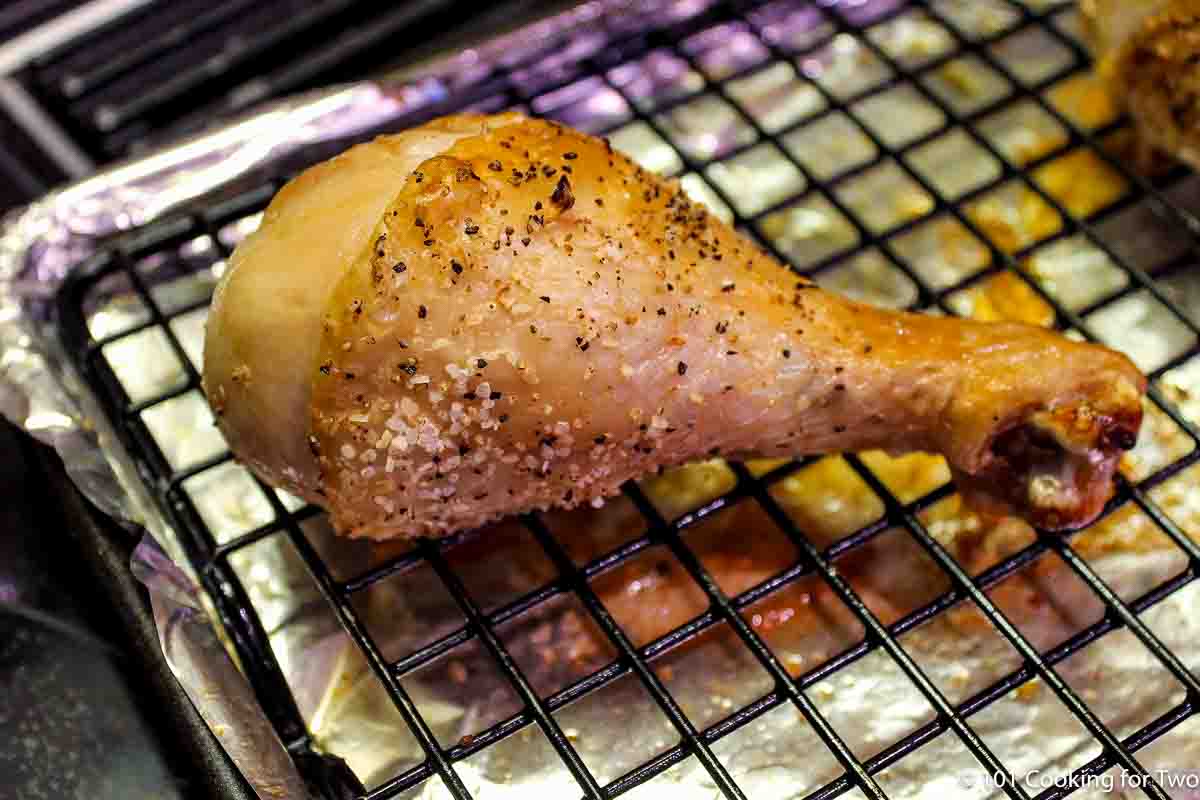
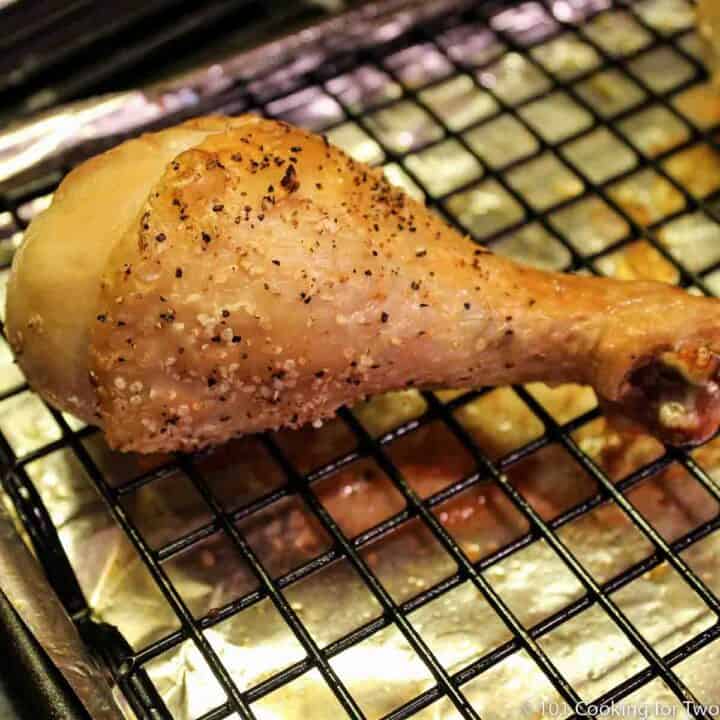
6. Cook to 185° to 195° internal temp—about 35 minutes. DO NOT STOP SHORT of 185° and use an instant-read thermometer. Let the cooked drumsticks sit for 5 to 10 minutes before serving.
For more details, keep reading. See the Recipe Card below for complete instructions and to print.
⏰How long to bake chicken legs (drumsticks)
It takes about 35 minutes at 425° to cook chicken legs in the oven to 185° internal temperature. The variables are the chicken leg size and the oven temperature.
- Chicken legs at 350°F convection or 375°F conventional – about 45-50 minutes
- Chicken legs at 375°F convection or 400°F conventional – about 40-45 minutes
- Chicken legs at 400°F convection or 425°F conventional – about 35-40 minutes
- Chicken legs at 425°F convection – about 35 minutes (I don't suggest 450°F conventional—instead, do 425°F conventional and add a few minutes)
The best cooking temperature is 400° or 425° for the most crispy skin. Lower oven temperatures, like 350° or 375°, will produce a slightly less crisp skin.
Always use an instant-read thermometer. COOK TO A FINAL INTERNAL TEMPERATURE. PLEASE, NEVER BY TIME ALONE.
♨️Pro Tips—get it right every time
- DO NOT SKIP THE PAT DRY; you will remove excess moisture that prevents crispy skin. Please see Chicken: To Rinse or Not To Rinse?
- Oil is optional, and if used, brush on before seasoning. It will change the final texture of the skin from thin and crispy to a little thicker but moisturized.
- Cooking on a rack removes the meat from the baking sheet and the drainage. Then, with convection, all sides of the legs will be cooked evenly. But if you don't have a rack, flip about 20 minutes into cooking.
- Cook at high temp, and you must use an instant-read thermometer to be sure you get to 185°. Do not guess.
- Let the chicken legs set for 5 to 10 minutes after cooking. Fluid will form between the meat cells during cooking, and the rest will allow it to reabsorb for juicy and tenderer results.
Seasoning options
We always use All Purpose Seasoning - 7:2:1 and 7:2:2, which is salt, black pepper, and garlic powder. But use the seasoning you love—some good options are onion powder, smoked paprika, poultry season, or other seasoning blends. For a touch of heat, add some cayenne pepper.
For BBQ chicken legs, add a BBQ rub or skip any dry seasoning and brush on some BBQ sauce near the end of cooking.
Marinaded with Italian dressing, teriyaki sauce, or lemon butter marinade will add a lot of flavors.
What chicken to use?
Use bone-in skin-on chicken legs (drumsticks). The cut joint area may have loose parts that should be trimmed along with excess skin.
Chicken legs are also known as chicken drumsticks. A chicken leg quarter with a thigh still attached to the drumstick is less commonly called a chicken leg. If you are cooking chicken leg quarters, please follow the Crispy Baked Chicken Thighs, which is similar but covers some other issues.
If you use previously frozen chicken legs, the meat may have some pink staining that looks like blood. This is the breakdown of the bone marrow, and the chicken is still safe if cooked to 165° minumin.
🌡️The best final temperature internal temp for chicken legs is 185°+
The best final internal temperature for oven-baked chicken legs is 185° or higher when the connective tissue melts, and the meat becomes moist and tender.
The connective tissue will start to melt at 175°. By 185°, you will get moist and tender results. America Test Kitchen takes it further for both thighs and drumsticks, suggesting 190° to 195° as the target internal temperature range. See American Test Kitchen (subscription required).
Many want to cook chicken legs to 165°, the minimum safe internal temperature for chicken per the FDA, but they will be tough and stringy from connective tissue.
Other Chicken Recipes
Add some great char to your chicken legs or thighs on your backyard BBQ gas grill with Grilled Chicken Drumsticks and Grilled Chicken Thighs.
Try these other chicken recipes, like Crispy Oven Baked Chicken Thighs, Oven-Baked Chicken Wings, or Baked Split Chicken Breasts. Or, if you are having a party, check out how to cook chicken for 50 to 100 people.
Serving
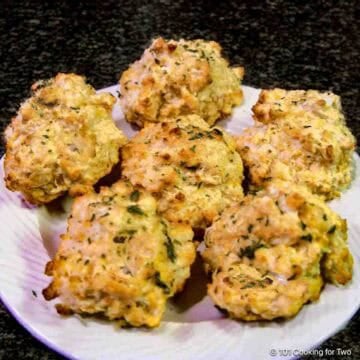
Serve with a green salad and your favorite hot side dishes of Convection Oven Baked French Fries, baked rice, broccoli, Microwave Corn on the Cob, or Roasted Red Potatoes.
How to store leftovers?
Seal in an airtight container and refrigerate for 4 days or freeze for 4 months. If frozen, thaw first, then reheat in an oven or an air fryer. A microwave may be used, but it may affect the texture.
❓FAQs
A lot of fat and fluid drains while cooking chicken drumsticks. You can cook drumsticks without a rack if you flip halfway through cooking, but you will be happier with a rack. The cooking will be more even, quicker, and easier to clean up.
You can if you wish. Without oil, the skin will be dry and crispy, but with a bit of olive oil or cooking spray before seasoning, it will be thicker and slightly less crispy.
No, it will interfere with the cooking and trap moisture, preventing crispier skin.

This recipe is listed in these categories. See them for more similar recipes.
Have you tried this recipe, or have a question? Join the community discussion in the comments.
👨🍳Recipe
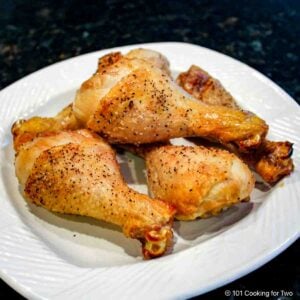
Baked Chicken Legs - Quick and Easy
Video Slideshow
Save this recipe to your inbox for later!
You may recieve the email without subscribing if you wish, but the subscription is convienent and has an easy one-ckick unsubscribe.
Ingredients
- 6 legs Chicken legs - about 1 ½ lbs-Scale to as many as you want
- salt and pepper to taste or other seasoning - or 7:2:1 or 7:2:2 seasoning
Instructions
- Preheat oven to 425° convection. Pat dry the chicken legs with paper towels.
- Line a sheet pan with aluminum foil and add a rack sprayed with PAM cooking spray. The rack allows all sides of the chicken to cook evenly out of drainage. You can cook without the rack but should flip halfway through cooking.
- Trim off any extra skin and any loose joint pieces.
- Season to taste with salt and pepper. You can use other seasonings if you wish. We use All Purpose Seasoning - 7:2:1 and 7:2:2, which includes garlic powder.
- Place the legs on a prepared sheet pan with the thicker part of the chicken legs towards the outside of the tray.
- Cook to 185° to 195° internal temp—about 35 minutes. DO NOT STOP SHORT of 185° and use an instant-read thermometer. Let the cooked drumsticks sit for 5 to 10 minutes before serving.
Recipe Notes
Pro Tips:
- DO NOT SKIP THE PAT DRY, or you will not have crispy skin.
- Cooking on a rack to get the meat off the pan to cook evenly and out of the drainage. If no rack, then flip at 20 minutes.
- Cook at high temp and you must use a thermometer to be sure you get to 185°+. Do not guess.
- Spice as you want.
- Scale to any amount you need
- For BBQ chicken legs, skip the seasoning or use a BBQ dry rub, then brush with your favorite BBQ sauce for the last 5 minutes.
- Good refrigerated for 3-4 days. Or will freeze well for 3-4 months.
Your Own Private Notes
To adjust the recipe size:
You may adjust the number of servings in this recipe card under servings. This does the math for the ingredients for you. BUT it does NOT adjust the text of the instructions. So you need to do that yourself.
Nutrition Estimate
© 101 Cooking for Two, LLC. All content and photographs are copyright protected by us or our vendors. While we appreciate your sharing our recipes, please realize copying, pasting, or duplicating full recipes to any social media, website, or electronic/printed media is strictly prohibited and a violation of our copyrights.
Editor's Note: This article was originally published on September 9, 2012. It has been updated with discussion and photos to improve the presentation and add more information. The recipe remains the same. Please enjoy the update.


Jane W says
Is it the same for thighs?
Dan Mikesell AKA DrDan says
Hi Jane,
Welcome to the blog.
The technique is similar but I have specific thigh instructions at https://www.101cookingfortwo.com/oven-baked-chicken-thighs/
I hope that helps.
Dan
Leah says
This is my go to receipe. I should have it memorized by now with how often my 12-year-old requests them. Y chicken" is her favorite. We just use salt & garlic. Thank you for helping me add an easy, well liked staple!
Gail Boyd says
What do you do if you don’t have a meat thermometer
Dan Mikesell AKA DrDan says
Hi Gail,
Welcome to the blog.
Unfortunately, I have no good answer. An instant read thermometer is about $10 at Amazon or big box stores. It will make anybody a 100% better cook. It will save the day for you many times. And it costs less than one spoiled meat.
For drumsticks, you will see things like poking with a knife and "fluids run clear". Nope. I tested it and found the temp was 155° usually when the fluid clears. That is not even safe, and definitely not done.
Dan
Geo says
Great recipe for a guy who is 67 and just starting to cook!🧑🍳 Thanks
Suescatlady says
Don't know how I missed this recipe. Tried your chicken thigh recipe. It is the best and so simple to do. Drum sticks come out equally wonderful. Hubby loves pepper so really apply fresh ground pepper liberally. Me not so much. I grind a moderate amount of sea salt on his and mine. For mine, I go light on the pepper. I have sprinkled a bit of rosemary on mine and loved it. I think they taste best fresh out of the oven. I usually pull the skin off but not on these. The skin is so crisp and not oily tasting. The first time I tried the recipe I did enough for a few nights. The skin wasn't crisp when reheated. Since this is so simple to do and doesn't take that long now I only cook as much as we will eat for one meal. Thank you so much for sharing.
Teri says
I did this and they turned out delicious. I used preseasoned legs that were huge from Costco. The seasoning burned like crazy and the bits that dropped in the pan smoked up my house. The meat was juicy and delicious, but next time, I will season with your mix and perhaps I won't get smoked out. The time allotted on the package said cook 20 minutes, turn the drums, and cook 15 more. They needed 10 more minutes to get to 185.
Tonya Rogers says
I followed recipe to the T, and I usually do my own thing. But this is absolutely the BEST ever drum recipe I have ever had in all my 46 years. Thank you!!!!
Allen says
I made this for dinner tonight and it was really good. I cooked it on a rack and didn’t turn them halfway. When it was done I noticed the bottoms of the legs were a little wet despite using the rack. To remedy this I simply turned them over and put it back in the oven on broil for 2 min. Worked Great!
carol says
Tonight I followed your recipe for drumsticks! Turned out great and they actually looked just like the picture!! I appreciate the info about heating to 190-195. I guess that’s what I did wrong (for years); these were tasty and more tender. I plan to use more of your recipes. Thank you!
Dan Mikesell AKA DrDan says
Hi Carol,
Welcome to the blog.
This is one of my favorite recipes still. I made it again a few days ago. Please let me know if you have any questions as you try other recipes.
Thanks again for the note and the rating.
Dan
Nett says
Hi Dan,
Thanks for the clear and thorough instructions. I'm wondering why you call for an internal temp of 185 when food safety sources say 165. Is it for assured crispness or just personal preference? About to try these so I'd love to know.
Dan Mikesell AKA DrDan says
Hi Nett,
Welcome to the blog.
This is covered in the post. See https://www.101cookingfortwo.com/the-art-of-drummies-oven-baked-chicken/#best-final-internal-temperature
Basically it is texture.
Dan
Aleis says
Chicken is Indeed safe at 165-170 but often is still too wet. 185 is just enough to make it extra crispy without tasting burnt or dry.
Anaysha Rajawat says
v
Sarah says
Worked well-- 30 minutes at 220C for us. Appreciate the simple recipe, drumsticks turned out moist with crispy skin.
wayne says
hi
how about hot air fryer instructions
Dan Mikesell AKA DrDan says
Hi Wayne,
Welcome to the blog.
I don't have specific instructions for an air fryer. BUT an air fryer is just a mini convection oven so if you follow the convection instructions, I would expect good results. As always, you are cooking to a final internal temperature and you are "plowing new ground" so check the internal temperature frequently as you get close to done.
If you do this, please post your results back here. Somebody else may benifect from your experence.
Dan
Marsha says
I used an air fryer for drumsticks and it worked well. However, it did not give enough time automatically. I had to do another 10-15 mins. It’s easy and they were delicious!
Wanda levy says
How about Ir fryer instructions tions
Dan Mikesell AKA DrDan says
Hi Wonda,
Hopeful a reader can pop in with something. I don't have an IR oven or grill.
I do know they cook faster but as I always say, you are cooking to a final internal temperature and never by time. So it should be possible, just watch the internal temperature very closely.
If you try it, please come back and report.
Dan
Elyce says
I always rinse chicken in cold water & pat dry before cooking. I never contaminate anything. We have Clorox wipes, soap & hot water. I wash my hands before, during & after. How "hard" is that? Chicken must be rinsed to get rid of bone bits, blood & juices or it gets an unpleasant "poultry" taste which I can't really explain, but it tastes off.
Asraf abid says
Bake with chicken skin is so delicious, I love it.
Mark says
Pork is fine to eat at 145 degrees. I always cook my pork to that temperature
and it is perfect
Dan Mikesell AKA DrDan says
Hi Mark,
Pork is fine at 145° for safety and most cuts are excellent at that temp. But the sentence ends with "you sure won't want your pulled pork to be cooked to 145°" referring to pulled pork from the butt that needs to get to 185° to start to melt the connective tissue. For good pulled pork butt, you need 200°+. 145° would be horrible, like chewing rubber.
Dan