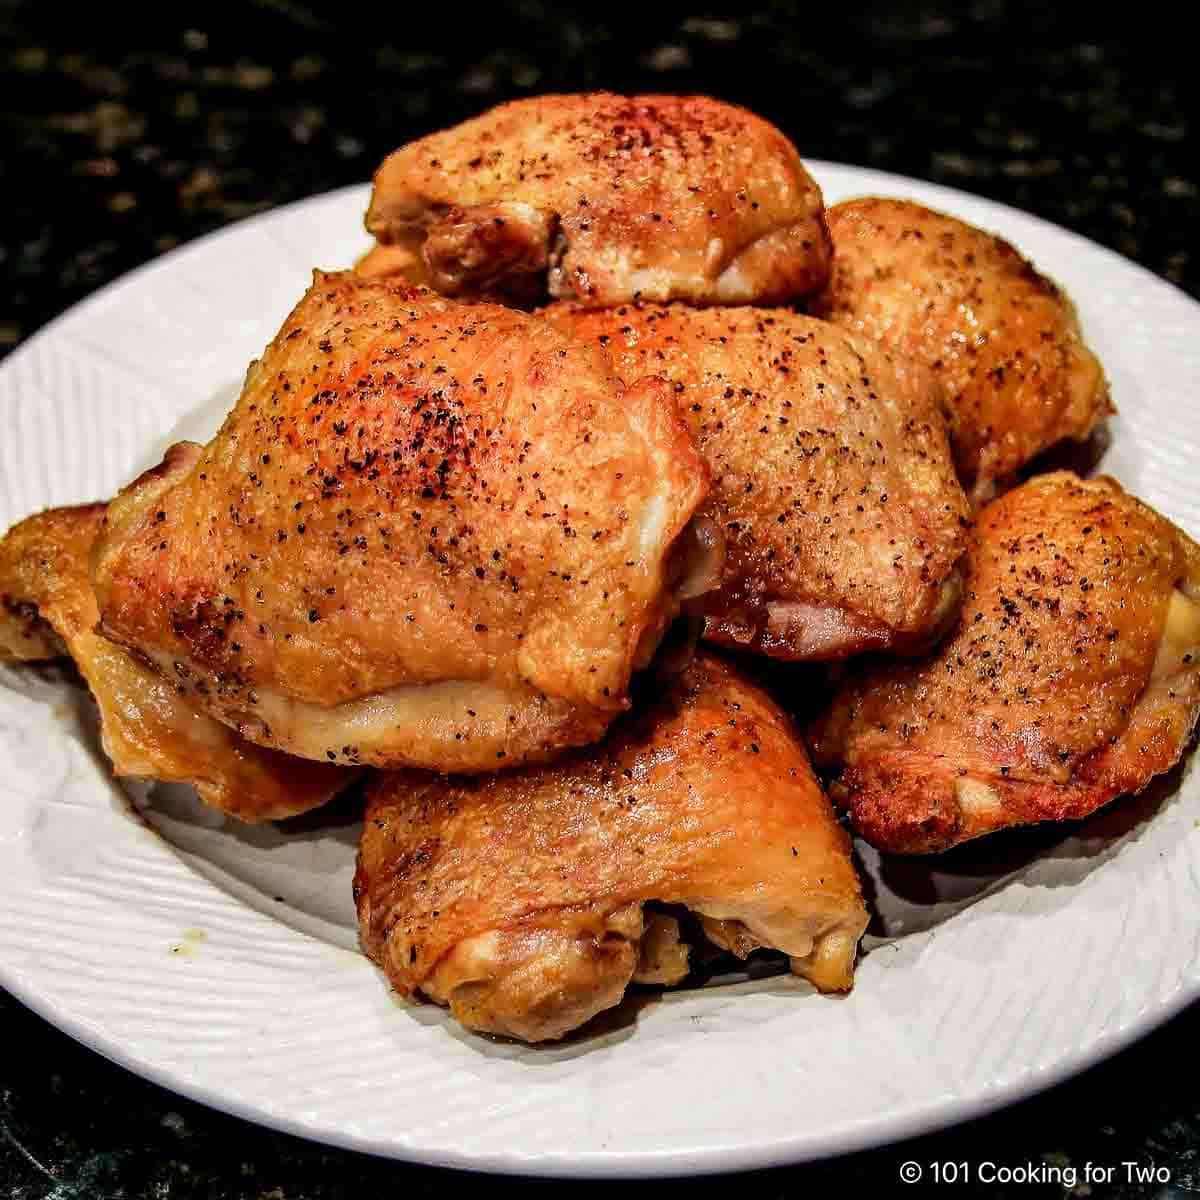
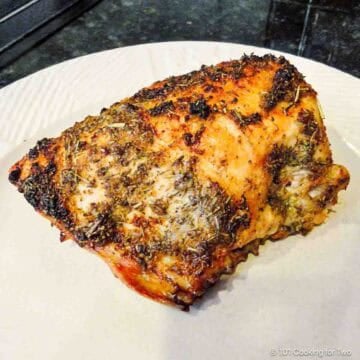
Crispy Baked Chicken Thighs are roasted perfectly in 30 minutes and seasoned to your taste. Using a convection oven for crispy skin, these moist and tender chicken thighs will become a family favorite.
Ingredients
Chicken thighs
Seasoning—salt, black pepper, and garlic powder mixture (All-Purpose Seasoning) OR
Optional seasoning of your choice
Jump To (scroll for more)
- Ingredients
- 👨🍳How to Bake Chicken Thighs—Step-by-Step Photo Instructions
- ⏰ How long to bake chicken thighs and oven temperature
- 🐓What chicken thighs to use
- Seasoning tips
- 🌡️The best final internal temperature
- Related chicken recipes
- Serving chicken thighs
- What to do about smoking ovens
- Storing and reheating leftovers
- Food safety
- ❓FAQs
- 👨🍳Recipe

Featured Comment from Gretchen :
"This is by and far my FAVORITE recipe. I’ve always hated chicken thighs, and now I know why… the internal temperature. I generally will modify a recipe to my liking, however yours is hands down sensational."
⭐⭐⭐⭐⭐
There are only a few secrets to making the best baked chicken thighs:
- Cook to the proper internal temperature of 185° to melt the connective tissue—don't stop at 165*.
- Use high heat in a convection oven for crispy skin—425° preferred, but other oven settings will work.
- Finally, using a rack to brown all sides and get the thighs out of the fatty drainage while they cook is best.
Make this recipe for chicken thighs in the oven with the easy step-by-step photo instructions with only 5 minutes of preparation and about 30 minutes of baking time. Cook along with baked chicken legs at the same temperature and time.
You can also fire up the gas grill for Grilled Bone-in Chicken Thighs or Grilled Chicken Drumsticks.
👨🍳How to Bake Chicken Thighs—Step-by-Step Photo Instructions
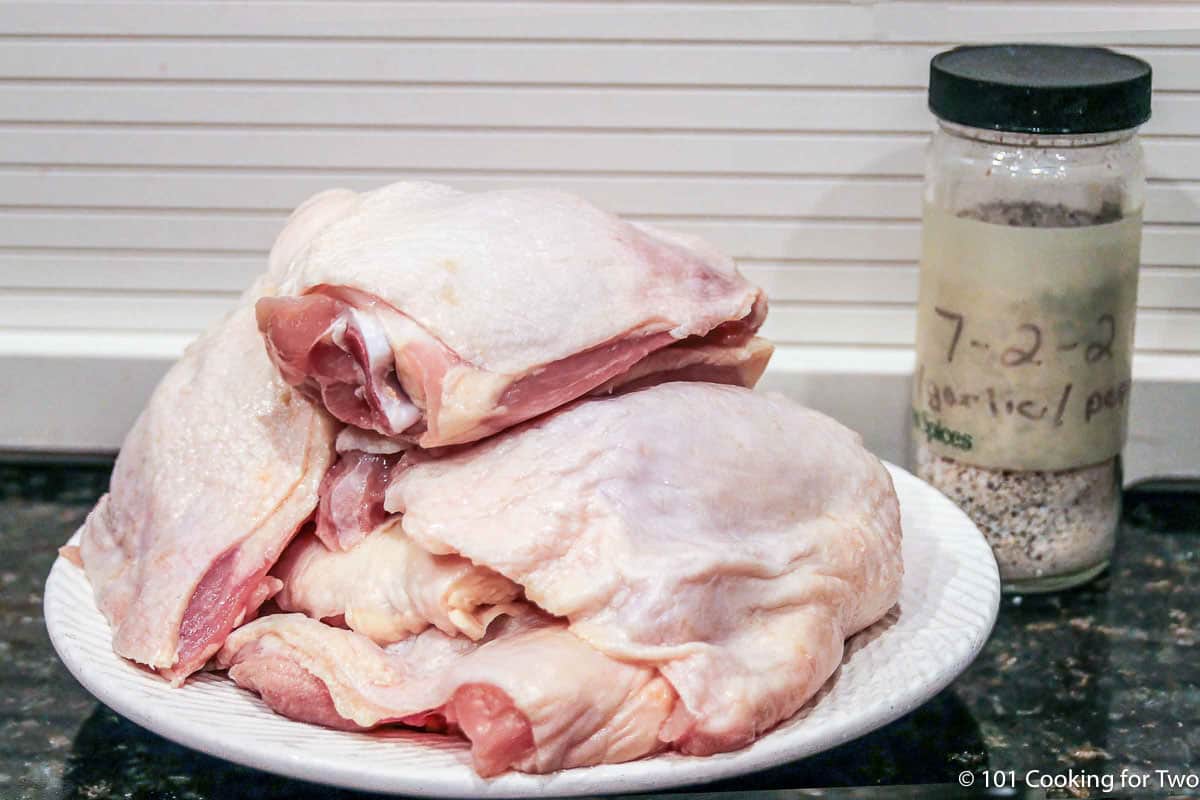
1. Preheat the oven to 425°F convection or 450°F conventional.
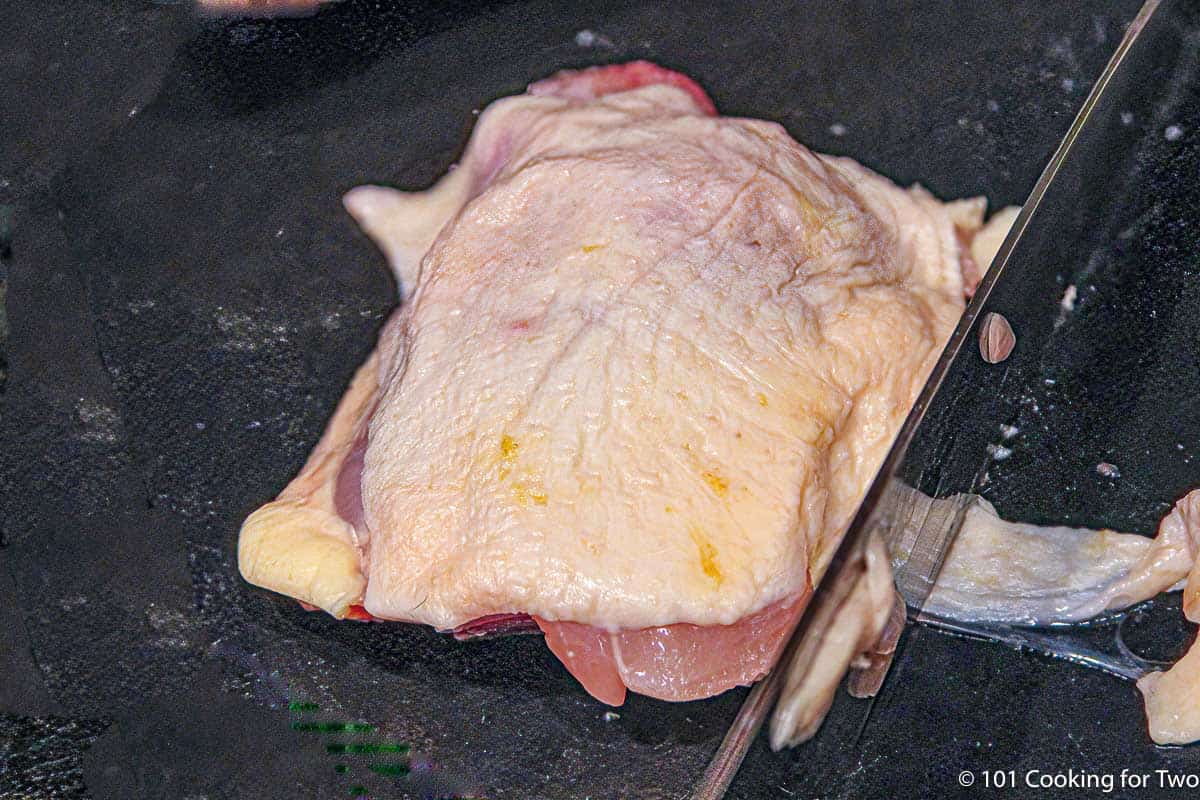
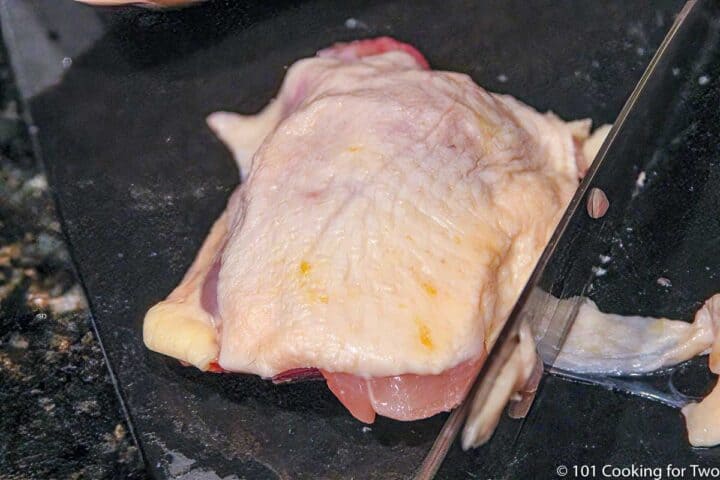
2. Pat dry and trim off any loose skin with no meat. Also, remove any fat that is easily removed.
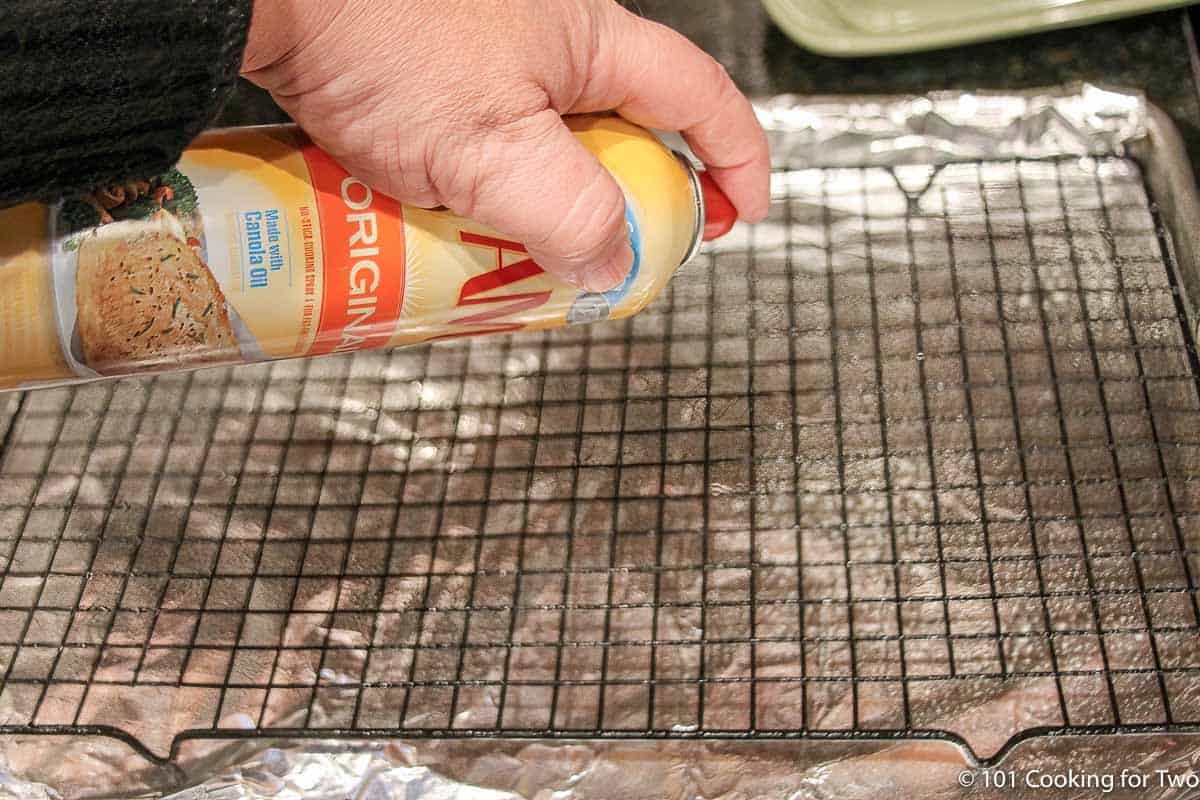
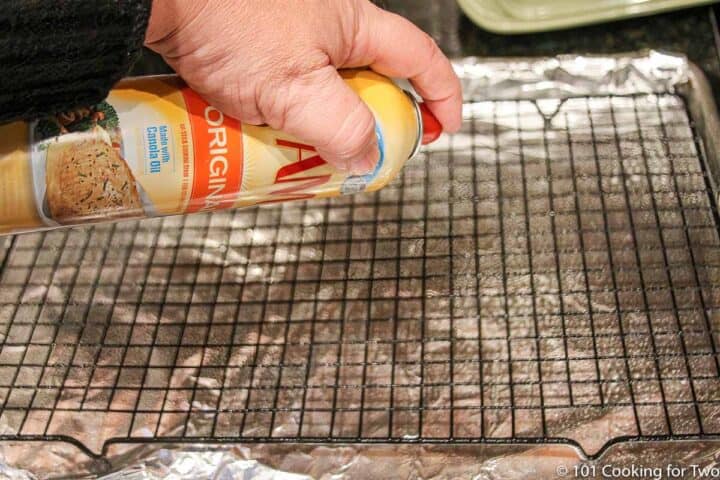
3. Prep a sheet pan by lining it with aluminum foil. Add a rack and a heavy coat of PAM cooking spray.
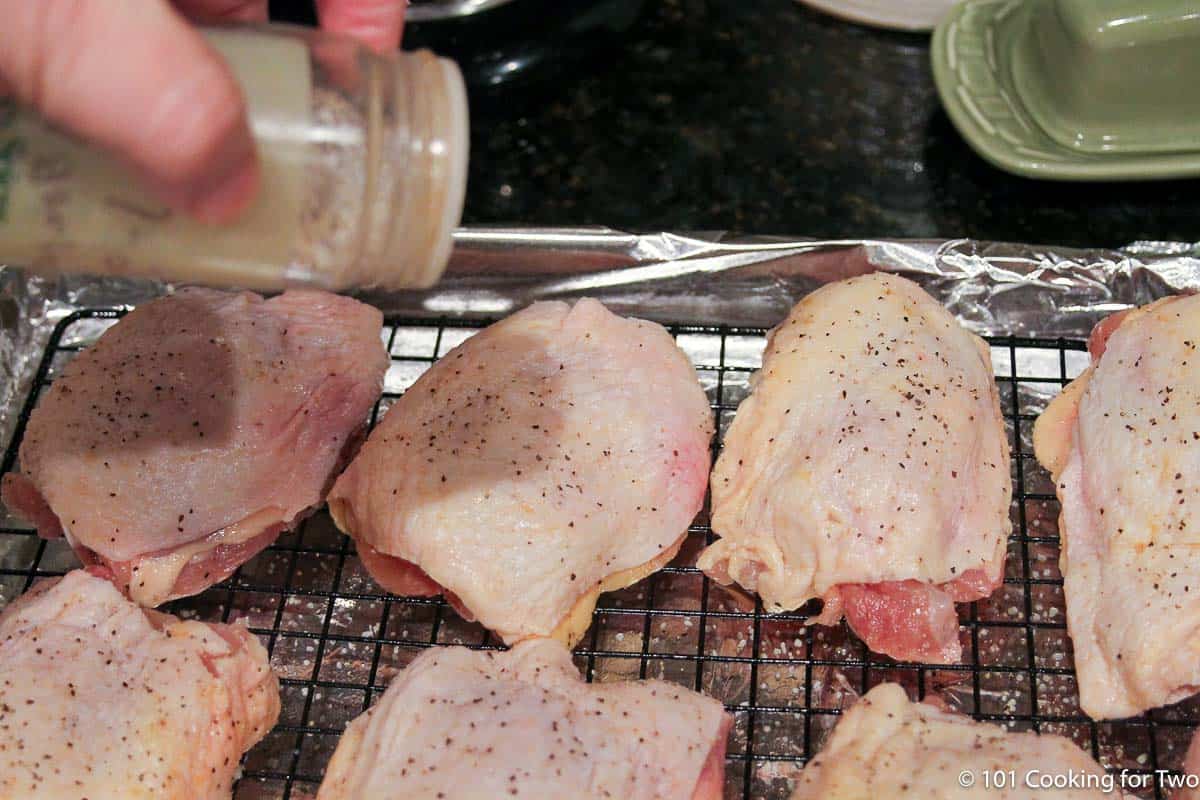
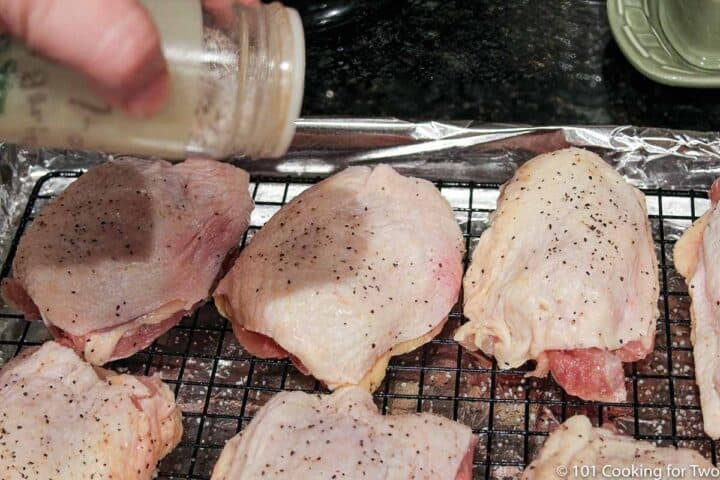
4. Spice both sides with the seasoning of your choice. Place on tray with the skin side up and tuck any skin under the thigh.
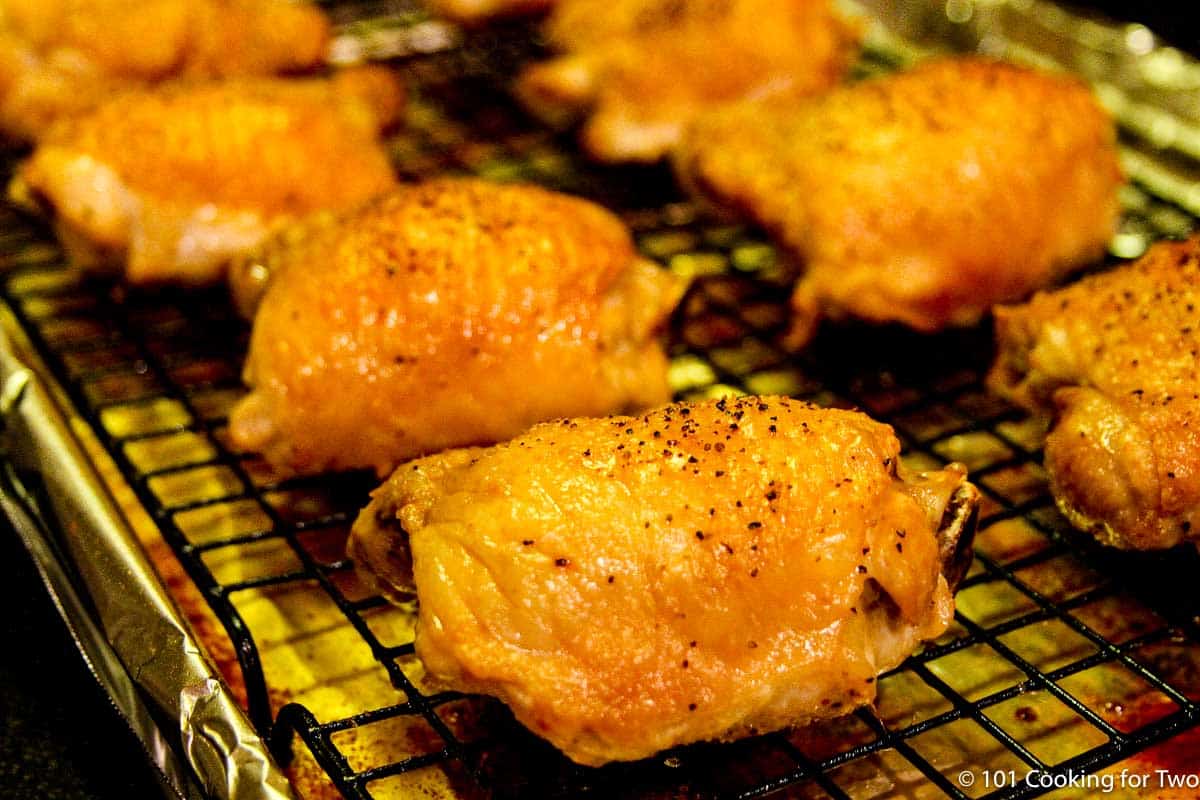
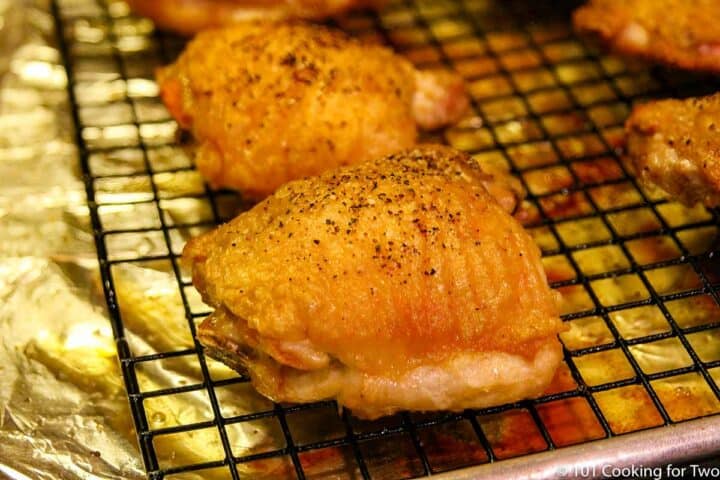
5. Bake until internal temp of 185°F—about 30-35 minutes of cooking time. Rest for 5 minutes or more before serving.
For more details, keep reading. See the Recipe Card below for complete instructions and to print.
⏰ How long to bake chicken thighs and oven temperature
The best oven temperature to bake bone-in chicken thighs is 425° convection, which will take about 30 minutes to reach 185° (the best internal temperature). This will vary by the weight and thickness of the thighs and your oven.
Chicken thighs baked at 350°F conventional takes about 50-55 minutes—will dry more.
Chicken thighs baked at 350°F convection or 375°F conventional takes about 45-50 minutes.
Chicken thighs baked at 375°F convection or 400°F conventional takes about 40-45 minutes.
Chicken thighs baked at 400°F convection or 425°F conventional takes about 35-40 minutes—recommended.
Chicken thighs baked at 425°F convection or 450°F conventional takes about 30-35 minutes—recommended.
Times are approximate and provided for planning only. Cook to a final internal temperature of 185°, using a meat or instant-read thermometer.
ALWAYS COOK TO A FINAL INTERNAL TEMPERATURE. PLEASE, NEVER BY TIME ALONE.
🐓What chicken thighs to use
This recipe assumes bone-in and skin-on chicken thighs. Just trim any loose fat and skin, then pat dry. Bone-in skinless chicken thighs will work fine but cook faster since they are thinner, and there is no bone to absorb heat.
If using skinless boneless chicken thighs, brush them with vegetable or olive oil. They tend to be smaller, thinner and have no bone to absorb heat. Cooking time will be faster, generally by 5-10 minutes. But remember, you are cooking to a final internal temperature of 185°+ and not by time.
Since there is no skin, if you want crispy skinless boneless thighs, they will need some breading like Panko breadcrumbs or a coating like oven-fried chicken breasts, but not this recipe.
Seasoning tips
A good sprinkle of kosher salt and black pepper for seasoning will be enough. I usually use my All Purpose Seasoning, which has kosher salt, black pepper, and garlic powder.
You may use other spices like paprika, oregano, thyme, Italian spice mix, poultry seasoning, garlic powder, onion powder, and other spice rubs.
Make great baked BBQ chicken thighs with a BBQ dry rub and brush with your favorite BBQ sauce for the last 5 minutes of cooking. Or make some tasty marinaded chicken thighs with my butter, garlic, and lemon chicken marinade or any marinade you love.
🌡️The best final internal temperature
The best final internal temperature for chicken thighs is 185° to 195*. You are melting some connective tissue, according to American Test Kitchen (subscription required).
The USDA's minimum safe internal temperature is 165°, perfect for white meat like chicken breasts, but dark meat with connective tissue will still be stringy and tough.
Related chicken recipes
For other inside quick chicken recipes, check out Baked Chicken Drumsticks, Seared Chicken Breasts, or Chicken Breasts in a Convection Oven.
Serving chicken thighs
Serve with one-pot mac and cheese, Stovetop French fries, Oven Roasted Baby Potatoes, and vegetables like a fresh spinach salad, green beans with almonds, or microwave corn on the cob. Finish the meal with Fresh Strawberry Pie with Jello or Old Fashioned Apple Crisp.
What to do about smoking ovens
Smoking ovens have been an issue for some due to high-temperature cooking. If you do have a problem, here are a few tips.
- If there is trimmable fat, trim it along with excess skin.
- The oven should be clean so the smoke isn’t coming from a previous splatter.
- Use a pan with some side to keep any splatter contained.
- Use the bake mode if your oven has a convection roast and convection bake. Or skip the convection entirely.
- You could turn down the oven by 25°-50°. This will increase the cooking time some and may cause some drying out. Remember to cook to an endpoint, not by time.
- Adding water to the pan under the rack will prevent smoking. It will cool the fat when it drips. This always works, but the moisture may interfere with some crispiness.
Storing and reheating leftovers
Store leftovers sealed in an airtight container in the refrigerator for 4 days or frozen for 3-4 months.
To reheat leftovers, thaw overnight in the refrigerator if frozen. Leftovers will have a much better texture when reheated in the oven at 350° for about 15 minutes. An air fryer works well, also. A microwave can be used, but it tends to affect the texture adversely.
Food safety
Raw chicken and other poultry should be considered contaminated and handled with care. Wash your hands carefully before and after touching raw chicken. We do NOT wash raw chicken routinely due to water splatter. See Chicken... To Rinse or Not To Rinse? for more information.
You must cook chicken to an internal temperature of 165° for safety—see the USDA for more information. You need to check this with an instant-read thermometer.
❓FAQs
No. It will interfere with the crisping of the skin. So, no aluminum foil or lids.
It is not needed, and I don't. Thighs are high in fat, and that will generally be enough. But you can, and the skin will still be crispy but a little thicker and with a different texture. So brush a few and see which you like.
A baking rack is highly recommended. Fat drainage will be rendered, and the rack will get the thighs out of the drainage for better texture. You can cook this without a rack, but you will be happier with a rack.
Use the rack on a baking tray with sides since there is drainage during cooking. Add aluminum foil to help clean up.
Most toaster ovens will be able to cook chicken thighs. The oven must have a controlled higher temperature and account for drainage. And like in bigger ovens, you cook to a final internal temperature and never by time.

This recipe is listed in these categories. See them for more similar recipes.
Have you tried this recipe, or have a question? Join the community discussion in the comments.
👨🍳Recipe
Crispy Baked Chicken Thighs
Video Slideshow
Save this recipe to your inbox for later!
You may recieve the email without subscribing if you wish, but the subscription is convienent and has an easy one-ckick unsubscribe.
Ingredients
- 2 chicken thighs - do as many as you want
- coarse salt and pepper to taste - or seasoning of your choice
Instructions
- Preheat oven to 425°F convection. If you don't have convection, use 450°F.
- Pat dry the chicken with paper towels. Trim off any loose skin with no meat. Also, remove any fat that is easily removed.
- Prep a sheet pan by lining it with aluminum foil. Add a rack and a heavy coat of PAM cooking spray.
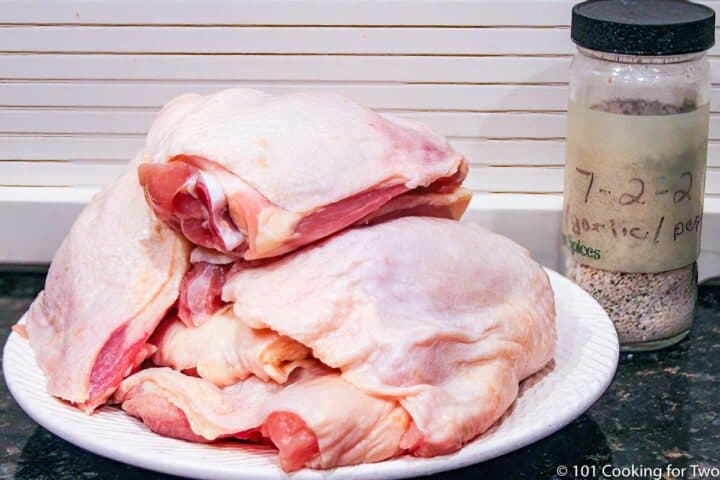
- Place thighs skin down and sprinkle lightly with the spices of your choice. Flip and tuck in any thin parts underneath and sprinkle the skin side. Just coarse salt and black pepper are fine, or the seasoning you like. We use our homemade 7:2:2, which adds some garlic.
- With skin side up, bake until internal temp of 185°F—about 30-35 minutes of cooking time. Rest for 5 minutes or more before serving.
Recipe Notes
Pro Tips
- DO NOT SKIP THE PAT DRY, or you will not have crispy skin.
- Trim off any trimmable fat or extra skin.
- Get the thighs up on a rack to let the rendered fat drain. It also gets them out of the drained fat. You can do this without a rack, but it is nicer with one.
- Cook at high temp and use a thermometer to be sure you get to 185°+. Do not guess. Thighs are safe to eat at 165°F but tender at 185°F.
- A convection oven is recommended but not required. Options for other oven temperatures are in the blog post above.
- Spice as you want. I often add a touch of Cayenne.
- Scale to any amount you need.
- This recipe can also be done in a toaster oven or an air fryer.
- Skip the seasoning and brush with your favorite BBQ sauce for the last 5 minutes to make great oven-baked BBQ thighs.
Your Own Private Notes
To adjust the recipe size:
You may adjust the number of servings in this recipe card under servings. This does the math for the ingredients for you. BUT it does NOT adjust the text of the instructions. So you need to do that yourself.
Nutrition Estimate
© 101 Cooking for Two, LLC. All content and photographs are copyright protected by us or our vendors. While we appreciate your sharing our recipes, please realize copying, pasting, or duplicating full recipes to any social media, website, or electronic/printed media is strictly prohibited and a violation of our copyrights.
Editors Note: Originally Published January 24, 2014. Updated with re-edited photos and added information since the original version.





Jamie Gronley says
Going go give this a shot! Then, heading over to your homemade spice page. Recovering from stroke so looking to keep things simple along with ingredients I have here at home! This recipe sounds wonderful!
And, HUUUGE ANIMAL LOVER HERE! Love the pup pics!
DrDan says
Hi Jamie,
Welcome to the blog. Hopefully, my simplistic (lazy?) approach to cooking fits your needs. Watch the salt if you are on a sodium restriction diet and use my seasoning. Just use the seasoning of your choice.
Molly and Lilly say Hi.
Thanks for the note.
Dan
Adam says
I too added a pinch of smoked paprika, it added a nice flavor layer and some color. Like some of the other readers, this was my first whack at the convection feature, it turned out perfectly (8 pieces) at 35 minutes. Skin was nice and crispy, and the meat was juicy and tender. I ended up brining them for 24 hours, (my wife had to postpone dinner plans due to work so I figured why not?) do you have any comment on that? Do you think it makes much of a difference or are these always pretty tender and juicy right out of the butcher paper? I don’t always have that much time on my hands with two little ones, a yellow lab, and a cat.
DrDan says
Hi Adam,
Welcome to the blog.
The convection does help crisp it up more. So definitely worth using if you have it.
On to the brining. There are some that will say brining for more the 6 hours on chicken is too long.
Most experts disagree and I believe they are right. You are good at 1 day and 2 days may be the max. But we do turkey for 24 hours all the time and 2 days frequently.
Did it help the tenderness? For sure it did. But over 12 hours is probably doesn't change things much.
You will get most of the effect in first 2 hours and really get fairly good effect in 30-40 minutes with chicken that is not too thick.
But chicken thighs are really good without brining. So try both ways.
Thanks for the note.
Dan
Kim says
If I'm using confection back what temperature and about how long
DrDan says
Hi Kim,
Welcome to the blog.
If by confection you mean convection then that is what the recipe is written for. So at 425 convection, it will be about 30 minutes. If you mean conventional (no fan), I would still do 425 since 450 tends to smoke a lot. It will take about 5 minutes longer.
Remember you are cooking to a final internal temperature, 185 degrees here, and not by time alone. There are variables of your oven, thickness of the chicken and exact starting temperature of the chicken.
Hope that helps. You will find more discussion in the body of the post.
Dan
Kim says
Thank you. Sorry for all the spelling errors. Crazy what a couple of glasses of wine will do 😂 going to try the thighs tonight !!!
Patricia Stickler says
What is 7:2:1 or 7:2:2? Just curious. I have never heard of that.
Thank you
DrDan says
Hi Patricia,
Welcome to the blog.
Those are homemade seasonings. They are linked in the post. It is 7 parts kosher salt, 2 parts pepper and 1 or 2 parts of granular garlic. Here is a link https://www.101cookingfortwo.com/everyday-spice-mix-721-mix/
Dan
DrDan says
Ok, complaint #3 out of 7000 comments. All recipes have dog pictures so it will take months to fix...
I think I will just leave this here for now...
DrDan
Carolyn David says
I've made these thighs many times using your recipe and tips, (especially about trimming excess fat and putting water in the pan) and they always come out delicious! I sometimes sprinkle sesame seeds on them if I'm feeling creative! Overall, I'm not much of a cook, so having this sure-fire winner is a big help to me.
Thanks, and a wag of the tail to your gorgeous dogs.
judy says
Love the dog
Cindy Clanton says
Our favorite chicken recipe!
Marie says
My love the chicken thighs they were awesome. And will your recipe again. Thanks
Cassie says
Hello! I am currently making chicken skins in the crockpot, I seared them first in a skillet and got them crisp but after some time in the crockpot they seem soft and soggy. I want to crisp the skins up but they're already done cooking internally. Can I bake them the same with just for less time to crisp the skins but not overcook?
DrDan says
Hi Cassie,
Welcome to the blog.
I doubt if there is a way to get crispy chicken skin out of a crock pot. And baking like my recipe will not do the trick. The only thing I can suggest is a few minutes under a broiler but I doubt if that will be adequate. I think that once chicken skin has been cooked in a crock pot, there is no hope for crispy.
Sorry I'm not very helpful.
Dan
Ruth says
I have made these thighs and your drumsticks, many times. I noticed the comments about putting water in the pan to prevent the smoking so I tried it. I may have put too much water in the pan initially, but I found that my thighs, that were on a rack, btw, were steaming and not getting crispy skin. After the 30 min on bake at 425 F, (not convect because I don't have it), I carefully poured off the pan drippings and put the chicken back in to try to crisp up the skin. It worked to some extent but I was afraid to leave it in too long for fear of drying out. The chicken still tasted great and was tender but I missed my really crispy skin. Next time I may pour the liquid off sooner.
DrDan says
Hi Ruth,
Glad you enjoy those recipes.
The water will stop the smoke. But if you haven't had that problem, I wouldn't do it. I think your lack of convection may also be a contributing factor to the effect on the crispy skin. With convection, that humidity would be moved around the oven.
Thanks for the report.
Dan
Laura Dean says
Tried to post picture of my Great White Pyrenees. Love yours!
DrDan says
Hi Laura,
Welcome to the blog.
Molly and Lilly say thanks. Give your Pyrenees a good ear rub from me.
As typical of wordpress blogs, only the administrator can put in an image and it must be on the web somewhere to link it in.
Dan
Chicken Staple says
Another suggestion that works great. Trim fat and clean thighs as mentioned, but cover with foil at 375 for about 50 minutes. Uncover, and drain broth...or save and use. Bake again for about 1/2 hour and you'll have tender thighs with a crispy skin.
Erin Carlson says
Can you please explain trimmable fat? This has me a little confused. Thanks
DrDan says
Hi Erin,
Welcome to the blog.
I mean if you can cut it off easily. Along the edge of the skin, that big chunk of fat on the underside, etc. Do not take the skin off and go digging into the meat.
Interesting enough, competition grillers and smokers do take the skin off and dig out any pieces of fat. I don't think it is worth your time.
Hope that clarifies.
Dan
Jennifer says
When making the chicken ..do u cover with foil?
DrDan says
Hi Jennifer and welcome to the blog.
No covering with foil. I do put foil under the rack for cleanup reasons. It would be a heck of a mess with the fat if you don't do that.
If you covered with foil, you would "steam" the skin and it would be wimpy and not crispy.
Dan
Kat R says
This is my go-to recipe. I used to avoid cooking with thighs because they always used to turn out either slimy or overcooked. These instructions were a godsend, and this is now my favorite thing to cook for dinner. I’ve used it 7 times with many different dry rubs. A big hit in my house is mesquite dry rub. Anyway, thank you so much for posting this recipe. I’m so satisfied with the way these turn out!
DrDan says
Hi Kat,
Glad it is working so well for you.
Thanks for the note.
Dan